Setup a Streisand VPN Server
Authors: Joe Blankenship
University of Kentucky
14 May 2018
Introduction
This is a tutorial on how to setup a virtual private network (VPN) using an AWS free tier account and the Streisand project.
There are several reasons to setup a VPN, but perhaps one of the most is the protection of your communications with participants in your research.
Setup an Amazon free tier account
Go here to setup an Amazon free account. You will be able to use this for one year for free so long as you stay within the data limits outlined in the free tier.
Once you have created an account and are logged in, go to Services and select IAM.
Then click on Users and select the Add User button.
Enter a username and check the Programmatic Access box. Then click the Next: Permissions button
Click the Attach Existing Policies Directly button. In the resulting window, type Admin in the search box, then selecting the AdministratorAccess option from the list. Once checked, click Next.
Click Download .csv and keep that file in someplace safe!
Setup Streisand
Note: You should be running this on an encrypted Linux-based operating system for maximum security.
You will need Python 2.7 for this (which comes pre-installed with most Linux systems). You will also need to have a SSH public key present in ~/.ssh/id_rsa.pub. If you don’t have this, type at the bash terminal and follow the instructions:
ssh-keygen
You will also need to install git and other dependencies:
sudo apt-get install git

sudo apt-get install python-paramiko python-pip python-pycurl python-dev build-essential
Then create a Python 2.7 virtual environment:
sudo pip install virtualenv
virtualenv --version=PYTHON2.7 vpn_install
Then enter the virtual environment, activate it, and install dependencies:
cd vpn_install
source bin/activate

pip install ansible markupsafe boto boto3
Clone the streisand software into your virtual environment:
git clone https://github.com/StreisandEffect/streisand.git && cd streisand
Once this is done, start the VPN server build process:
./streisand
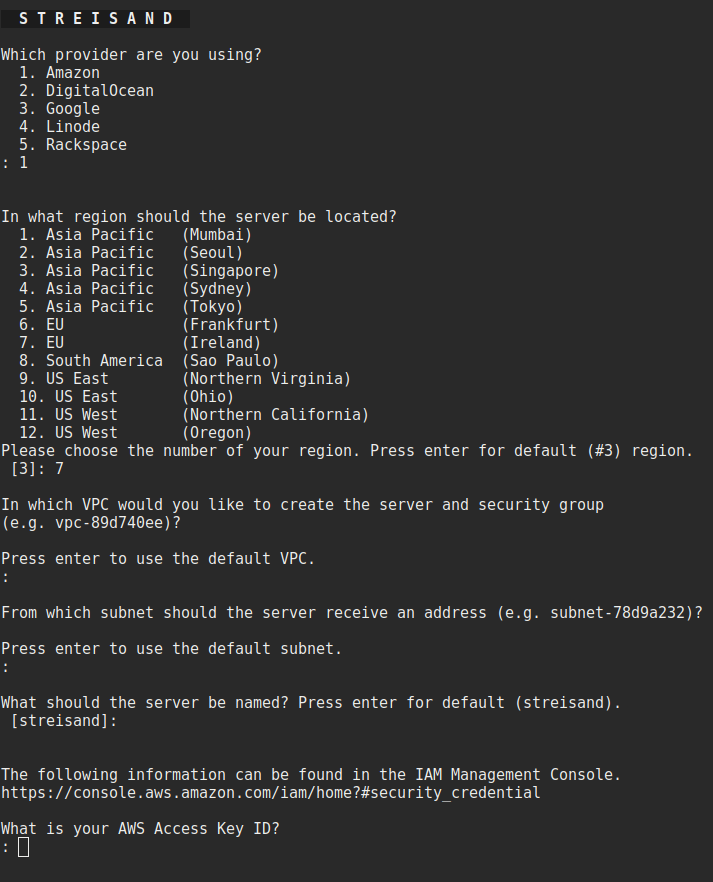
Follow the prompts to choose the provider, the physical region for the server, and its name. When prompted for your AWS Access Key ID and AWS Secret Access Key, open the CSV file we created earlier. Copy and paste the appropriate information into the proper field.
The process can take about 10-15 minutes to complete after this.
Using the Streisand VPN
In your home director, there should be a streisand directory generated by the install process. Open the streisand.html file inside of the directory.
Follow the directions for how to install SSL certificates to your browser and to connect to your server.
References
Harvey, G. (2016). Streisand - setting up a secure, private and totally free VPN. Retreived from: http://devops.host/blog/streisand-vpn.html
Striesand Project on Github (2018). Retrieved from https://github.com/StreisandEffect/streisand#prerequisites
License
This work is licensed under a Creative Commons Attribution-NonCommercial-ShareAlike 4.0 International License.